Paper Quiz: a step-by-step guide for teachers
10 illustrated steps: choose Library questions and a Classroom, print cards, pair your phone, scan A/B/C/D and show accuracy leaderboards.
Open Paper Quiz and follow the guide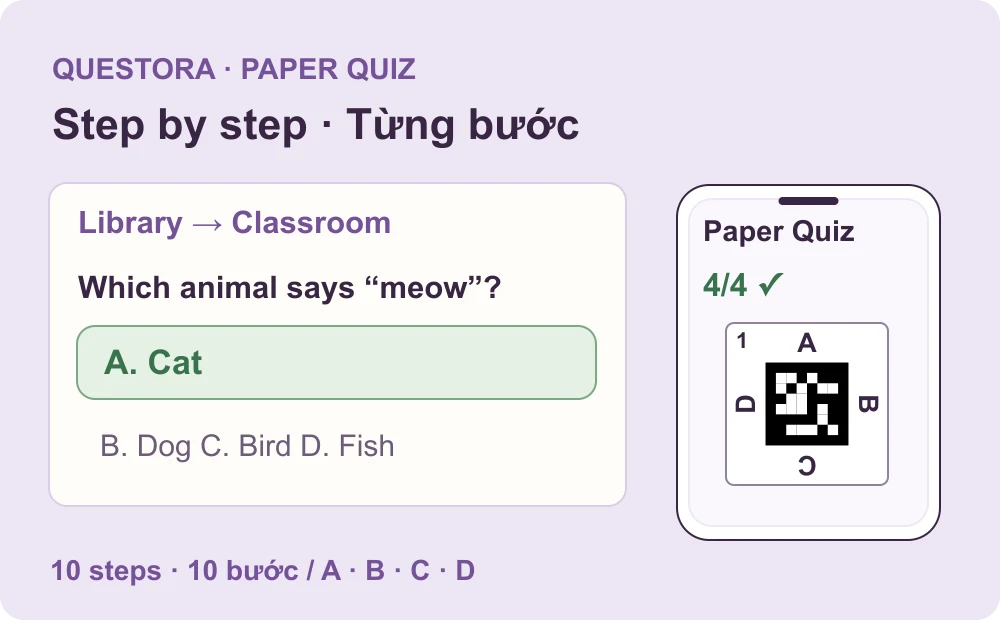
Paper Quiz lets the class answer with paper cards while the teacher scans with one phone. Follow this complete workflow from preparation to final results. The illustrations use sample pupils and the current control names; select any image to enlarge it.
Before you start
- An internet-connected computer and classroom screen/projector; one camera phone with Safari or Chrome.
- A Questora teacher account, an existing Classroom pupil list and a question set saved in My Library.
- Multiple-choice questions with answer keys and enough printed Questora cards for the pupils.
- Paper Quiz is in Beta. Test with a small group first to check the camera, lighting and cards in the actual room.
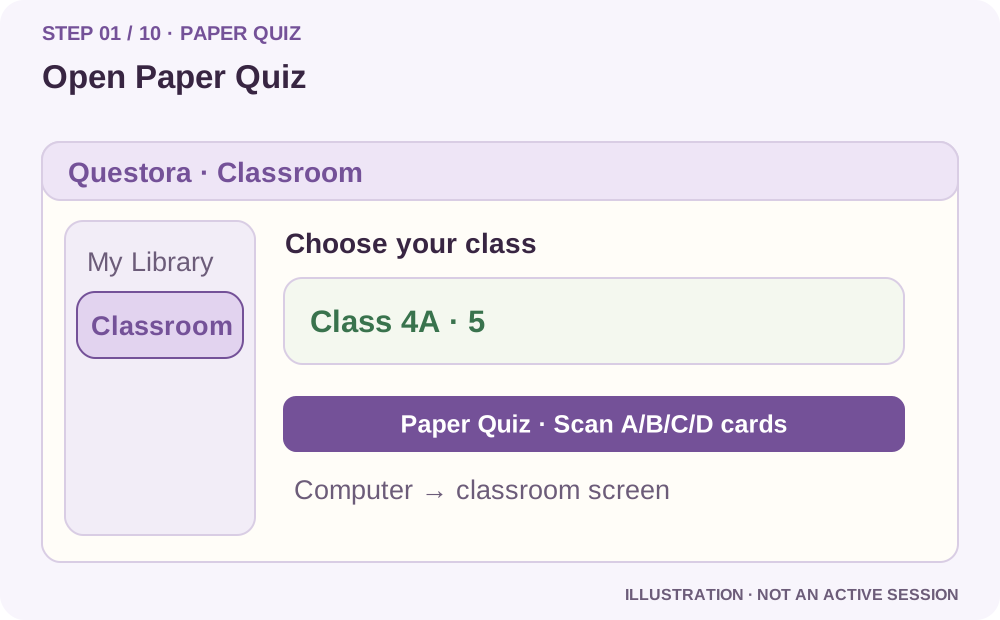
1. Open Paper Quiz from Classroom
- Sign in to your teacher account on the computer connected to your classroom screen or projector.
- Open Classroom and select the class you want to teach. If needed, create the class and add pupils first; Quick add students accepts a pasted list.
- Choose Paper Quiz · Scan A/B/C/D cards. Keep the computer tab open throughout the lesson.
You need a computer for the questions and one camera phone for the teacher. Pupils only need printed Questora cards. Both teacher devices need an internet connection; they do not have to use the same Wi-Fi.
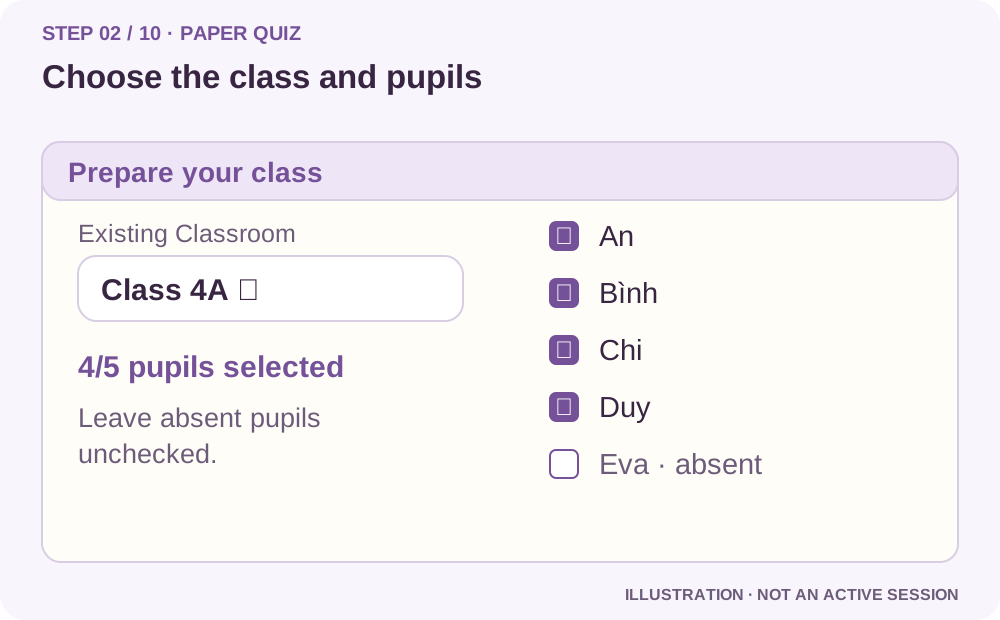
2. Choose the class and participating pupils
- In Prepare your class, check Existing Classroom. Select the correct class if it is not already selected.
- Expand pupils selected to review the list. Uncheck absent pupils and include only those taking part.
- Check the number selected against your plan allowance. You will match the numbered cards to names after opening the session.
Selecting pupils here does not mark Classroom attendance or change Points, Gold or City data.
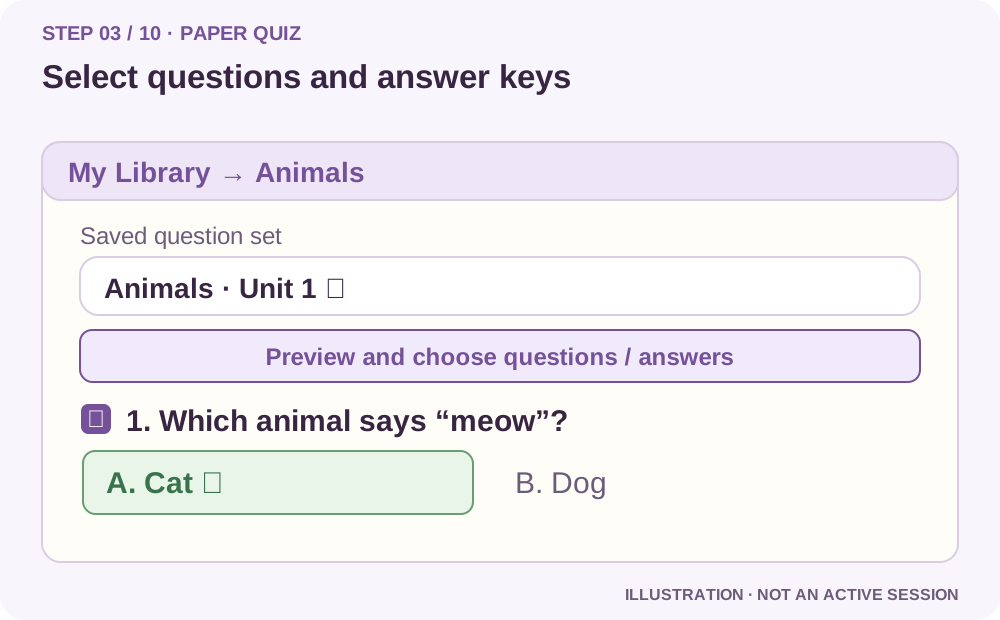
3. Select Library questions and check the answer keys
- Use Search My Library to find a saved set, then choose it under Saved question set. Use the page controls if the set is on another page.
- Choose Preview and choose questions / answers. Tick the questions you want to use and check the marked correct answer for every question.
- Paper Quiz includes valid multiple-choice questions with 2–4 choices and exactly one correct answer. Oral, written and other unsupported questions are excluded. If you need to fix a key, do it in My Library before starting.
A mixed set can be selected, but only its eligible multiple-choice questions enter Paper Quiz. Check the selected question count before continuing.
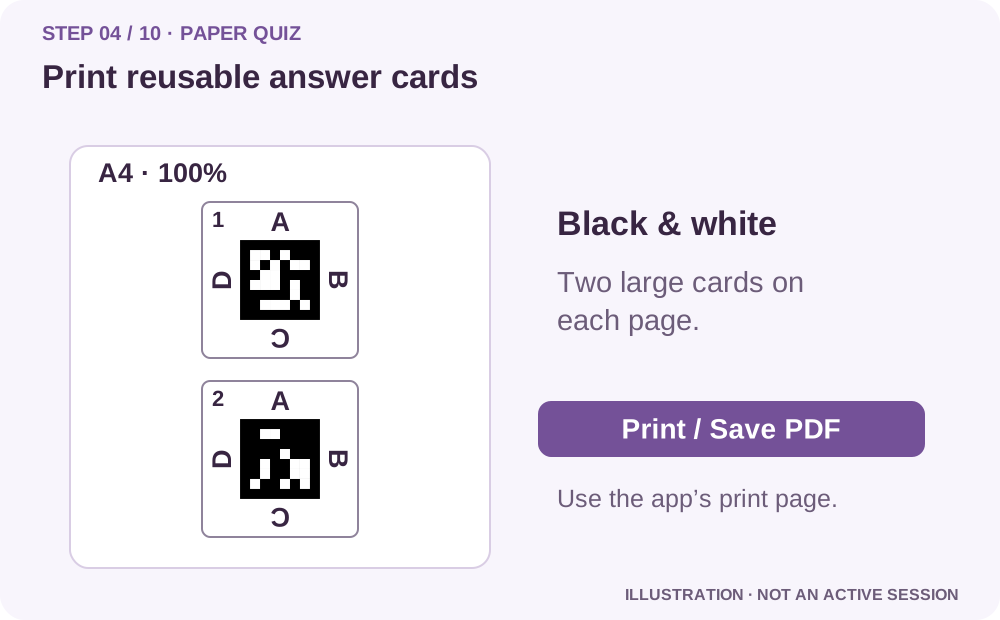
4. Print reusable Questora answer cards
- Choose Print reusable cards. In the cards tab, choose Print / Save PDF. You can prepare these cards before the lesson.
- Print in black and white at 100% scale. The print layout places two large cards on each page. Cut around the card frames and keep the complete black marker and its white border visible.
- Use the numbered cards generated by Questora. Keep one set to reuse for other lessons; do not substitute a normal QR code or another app’s answer cards.
The printed A/B/C/D card identifies a pupil and an answer direction. It is different from the private phone-pairing QR in step 6. Print from the application, not from this guide illustration.
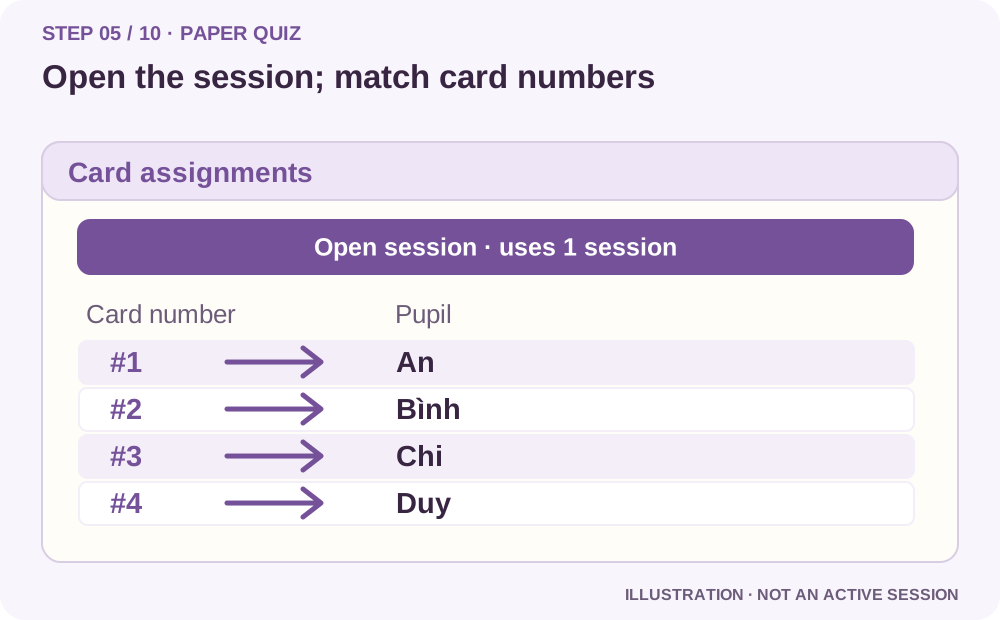
5. Open the session and hand out the right card numbers
- Return to the setup tab. Check the class, pupil count and selected question count one more time.
- Choose Open session · uses 1 session. A successful start uses one session from the monthly allowance, even if you end it early.
- In the lobby, expand Card assignments. Hand out card #1 to the pupil listed beside #1, card #2 to the next listed pupil, and so on. Each pupil must have a different card number.
Recheck this mapping in every new session, especially when different pupils are absent. A wrong card-to-name match puts the answer against the wrong pupil.
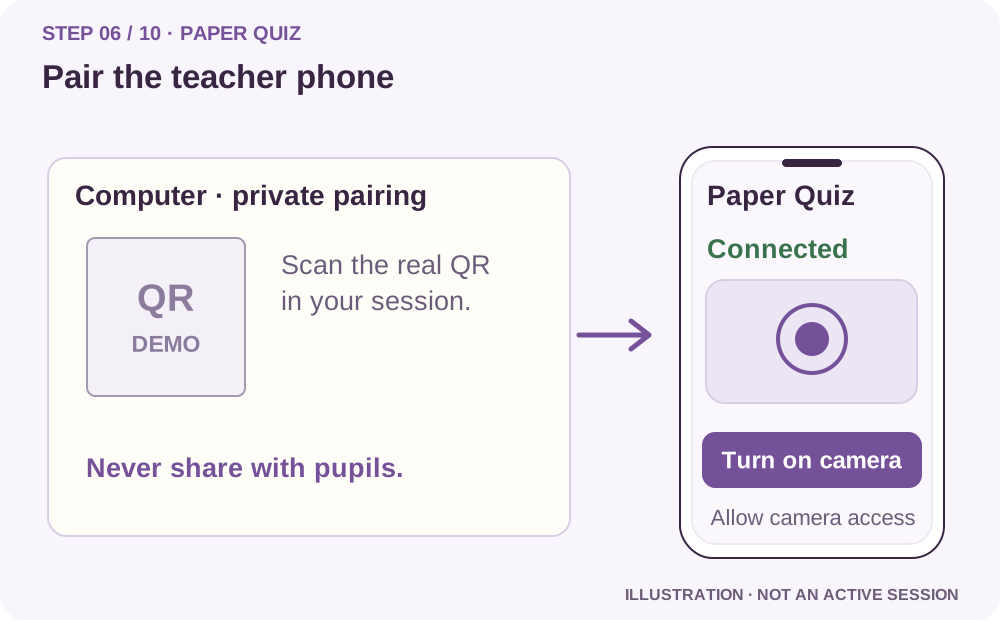
6. Pair the teacher’s phone and allow the camera
- On your own phone, use its Camera or QR reader to open the pairing QR shown on the computer. Open the link in Safari or Chrome; no teacher app installation is required.
- Wait for Connected on the phone and Scanner connected on the computer. On the phone, choose Turn on camera and allow camera access for the Questora site.
- Keep both pages open. Do not send the pairing link to pupils or share its QR publicly. The pictures in this guide deliberately contain no working pairing link.
Pair before projecting the activity to the class. The QR grants access to the teacher scanner; pupils do not scan it. If a chat app opens the link in an embedded browser, open it in Safari/Chrome instead.
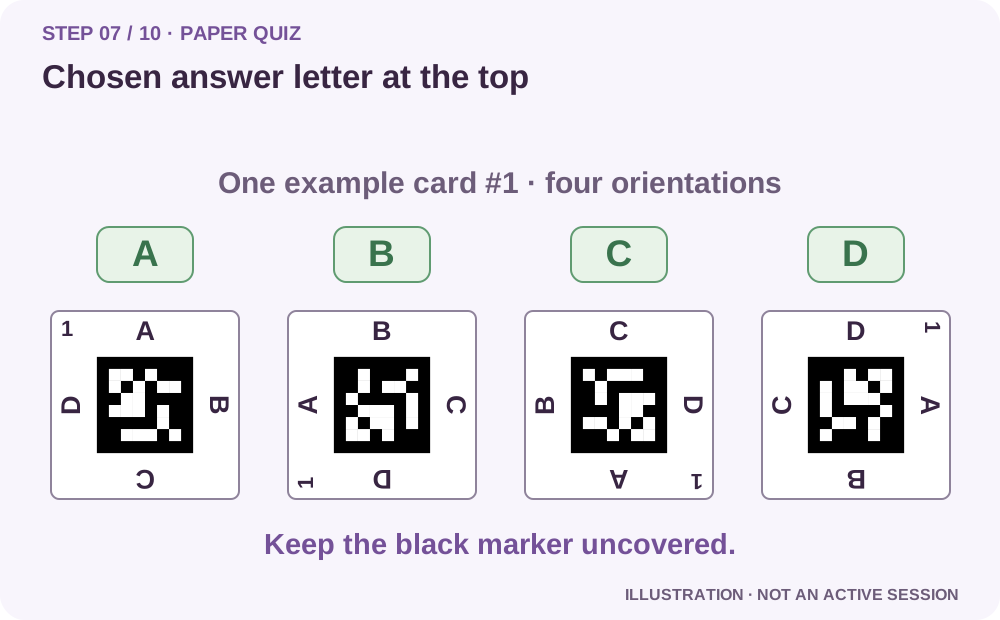
7. Start the question and show how to turn the card
- When the phone is connected, choose Start question 1 on the computer. The pairing QR is hidden and the question appears for the class.
- Read the question and choices together. Each pupil rotates their own card so the chosen answer letter is at the top: A, B, C or D. Only choose a letter that is offered for that question.
- Pupils hold the card facing the teacher’s camera, upright and steady, with fingers outside the black marker. Keep cards apart so one does not cover another.
The four examples below show the same card #1 in four orientations. In the real class, every pupil keeps their own unique numbered card.
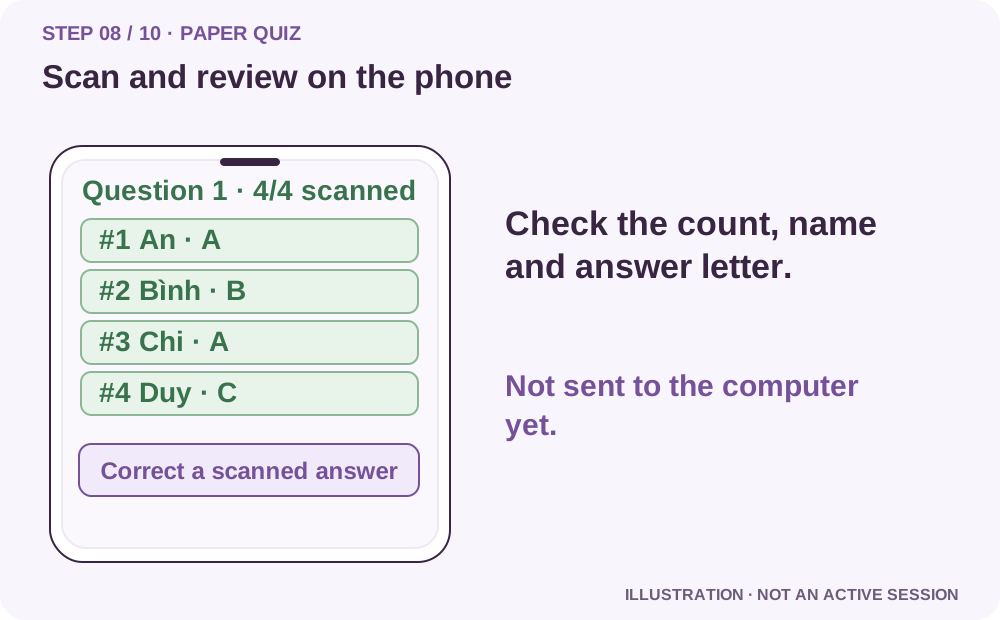
8. Scan, check names and correct a misread if needed
- Move the phone camera slowly across the raised cards. Hold each group in view until their names and answer letters appear in the scanned list.
- Check the scanned count against the number playing. Ask missing pupils to hold the card straight, face the camera and uncover the marker. Adjust lighting or move closer if needed.
- Before sending, choose Correct a scanned answer if a reading is wrong. Change the choice for that card, then check it against the pupil’s card. A changed card can also be scanned again before locking.
The computer receives a batch only after the phone sends it. A phone showing all cards scanned does not yet mean the computer has received those answers.
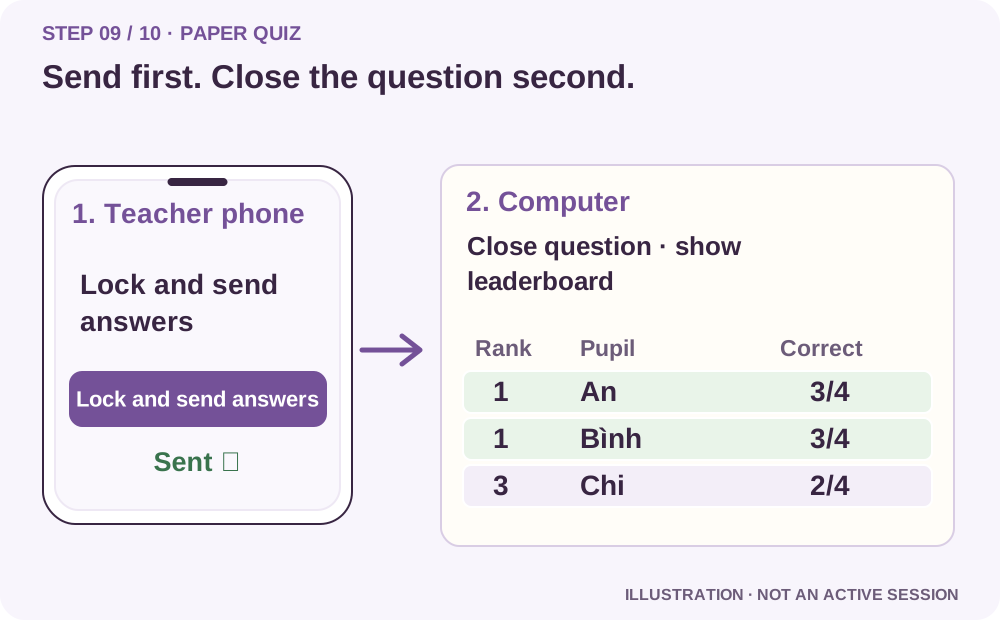
9. Send from the phone, then close the question on the computer
- On the phone, choose Lock and send answers. Wait for Sent · waiting for teacher. On the computer, confirm that the answers received count has updated.
- On the computer, choose Close question · show leaderboard. If answers are missing, Continue scanning or explicitly Close with missing answers; missing answers score zero.
- Review the correct answer and leaderboard together. Each correct answer earns one point. Equal totals share a rank; speed and card number do not add points. Choose Next question to show the next prompt. Pupils turn their cards to answer again, then repeat steps 8–9.
These are two different actions on two devices: send on the phone first, close on the computer second. Once closed, the question is scored and the class moves on.
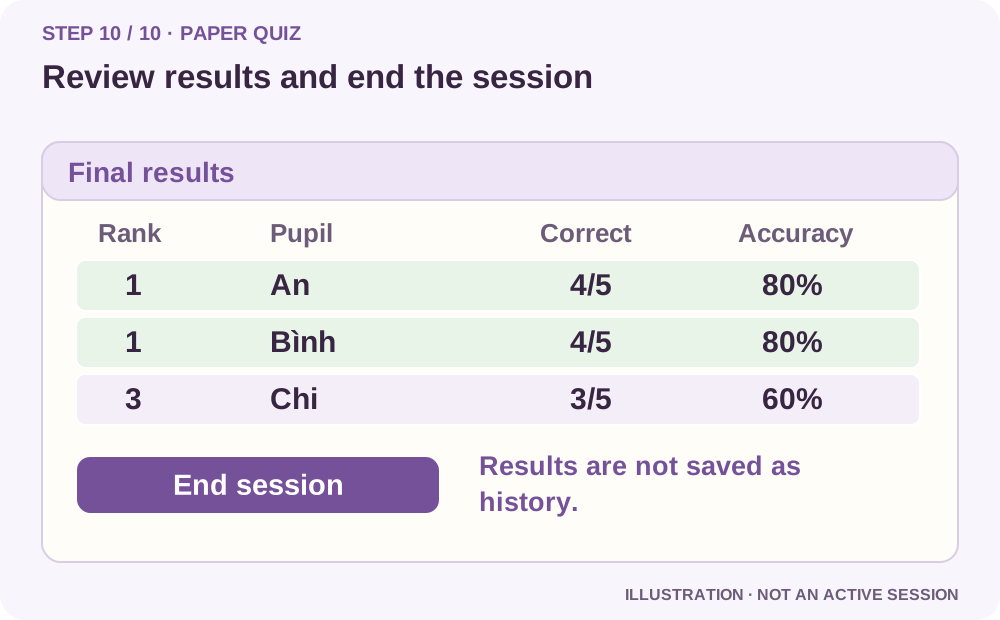
10. Show the final results and end the session
- After sending and closing the last question, choose Show final results. Review the number correct and accuracy for each pupil.
- If you need a personal record, take a screenshot while this results page is still open. Questora does not save Paper Quiz history and does not add Points, Gold or attendance to Classroom.
- Choose End session to release the room, then return to Classroom. Keep the printed cards for next time. Avoid refreshing or closing the teacher tab before reviewing the results.
Ending early does not score the current unclosed question. Results are temporary in the teacher tab; they cannot be reopened as a saved report after the tab is lost.
Free, Pro and Early Bird allowances
- Free: 2 sessions each month, up to 30 pupils, 15 questions and 20 minutes per session.
- Pro / Early Bird: 20 sessions each month, up to 60 pupils, 40 questions and 40 minutes per session.
- Each teacher can have one active session. Beta has a shared capacity limit; if full, wait and try again. Reconnecting the phone to an existing valid session is not a new session start.
If scanning or the connection does not work
- Cannot find a set: confirm it is saved in My Library, search its title and check later pages. An oral-only set has no eligible Paper Quiz questions.
- Camera unavailable: open the HTTPS link in Safari/Chrome and allow camera permission for the website. Close other apps using the camera and try again.
- Card not recognized: use Questora cards printed large enough with the white border intact. Uncover the marker, keep it upright and avoid glare. Scan smaller groups if needed.
- Wrong pupil name: check Card assignments on the computer. Do not swap cards between pupils during the session.
- No answers on the computer: choose Lock and send answers on the phone and wait for the sent confirmation before closing the question.
- Phone disconnected: keep the teacher tab open and check the internet connection. Use Reconnect scanner on the computer when shown, or the QR in the lobby, to open the scanner again. Do not open a new session just to reconnect the phone.
- Previous session still active: choose Close previous session only when you are sure it is no longer in use. Results lost after closing or reloading the teacher tab cannot be restored.